Did you know you can gather data, populate documents, and collect signatures all on the trusted Formstack platform? Our products, Formstack Forms, Documents, and Sign, make it easy to create completely automated digital workflows that meet your unique business needs. Today's tutorial focuses on a real estate use case, but can be easily applied across several industries.
Who needs this tutorial?This tutorial is for anyone who wants to eliminate the hassle that accompanies collecting signatures. No one wants to run around the office to remind people to sign a document they received last week. With Formstack Documents and Formstack Sign, we've created a workflow that makes the signing process quick, easy, and painless.
Today, we are going to use the example of a rental application. With these steps, you can send your tenants a rental application to complete, create a merged document, and collect a signature with just a few clicks.
Before you get started
- A rental agreement template with merge fields ({$FirstName}, {$DealName}, etc.)
- Formstack Forms account
- Formstack Sign account
- Formstack Documents API Key/Secret
4 steps to set it up
Step 1: Create your template.
First, we need to set up the template for our rental application. For this example, we are going to use a PDF template from the Formtack Documents website. We will need to make a few updates so Formstack Sign knows how to populate our signature, so make sure you know how to update your fillable PDF template. You can also use a Word Document.
Step 2: Add your signature merge fields.
Since we are collecting signatures for our rental agreement, we will need to add some text tags in addition to our usual merge fields ({$FirstName}, {$DealName}, etc.).
These text tags are a bit different from our merge fields. For example, the text tag you might add for the first signature in your document might look like this:[sig|req|signer1].
There are three parts in this text tag. Let's break those down a little.
1. Text Tag Type
The first part signifies thebtype of text tag. Formstack Sign offers a few different types of text tags which include:
- sig - to require a signature (Example: [sig|req|signer1])
- check - for creating a checkbox (Example: [check|req|signer1])
- initial - for requiring a signer's initials (Example: [initial|req|signer1]
- date - will auto-populate the date when passed through Formstack Sign (Example: [date|req|signer1])
- text - will provide a short answer text box in place of the text tag (Example: [text|req|signer1])
2. Required Field
This part of the tag lets Formstack Sign know whether or not the field is required.
(Examples: [sig|noreq|signer1], [initial|req|signer1]).
3. Signer Identification
Since you may have multiple people who need to sign your document, the last part of the tag identifies which signer should sign where.
(Examples: [sig|req|signer1], [sig|req|signer2], [sig|req|signer3], etc.)
Since we want both the leasing agent and the applicant to sign and date the application, we're going to add four text tags to the bottom of our document.
Applicant signature: [sig|req|signer1]
Applicant signature date: [date|req|signer1]
Leasing agent signature: [sig|req|signer2]
Leasing agent signature date: [date|req|signer2]
Pro-tip: After you're finished adding your text tags and creating your template, change the color of your text tags to white. This will hide them inside of your document.
Step 3: Upload your document and create your delivery.
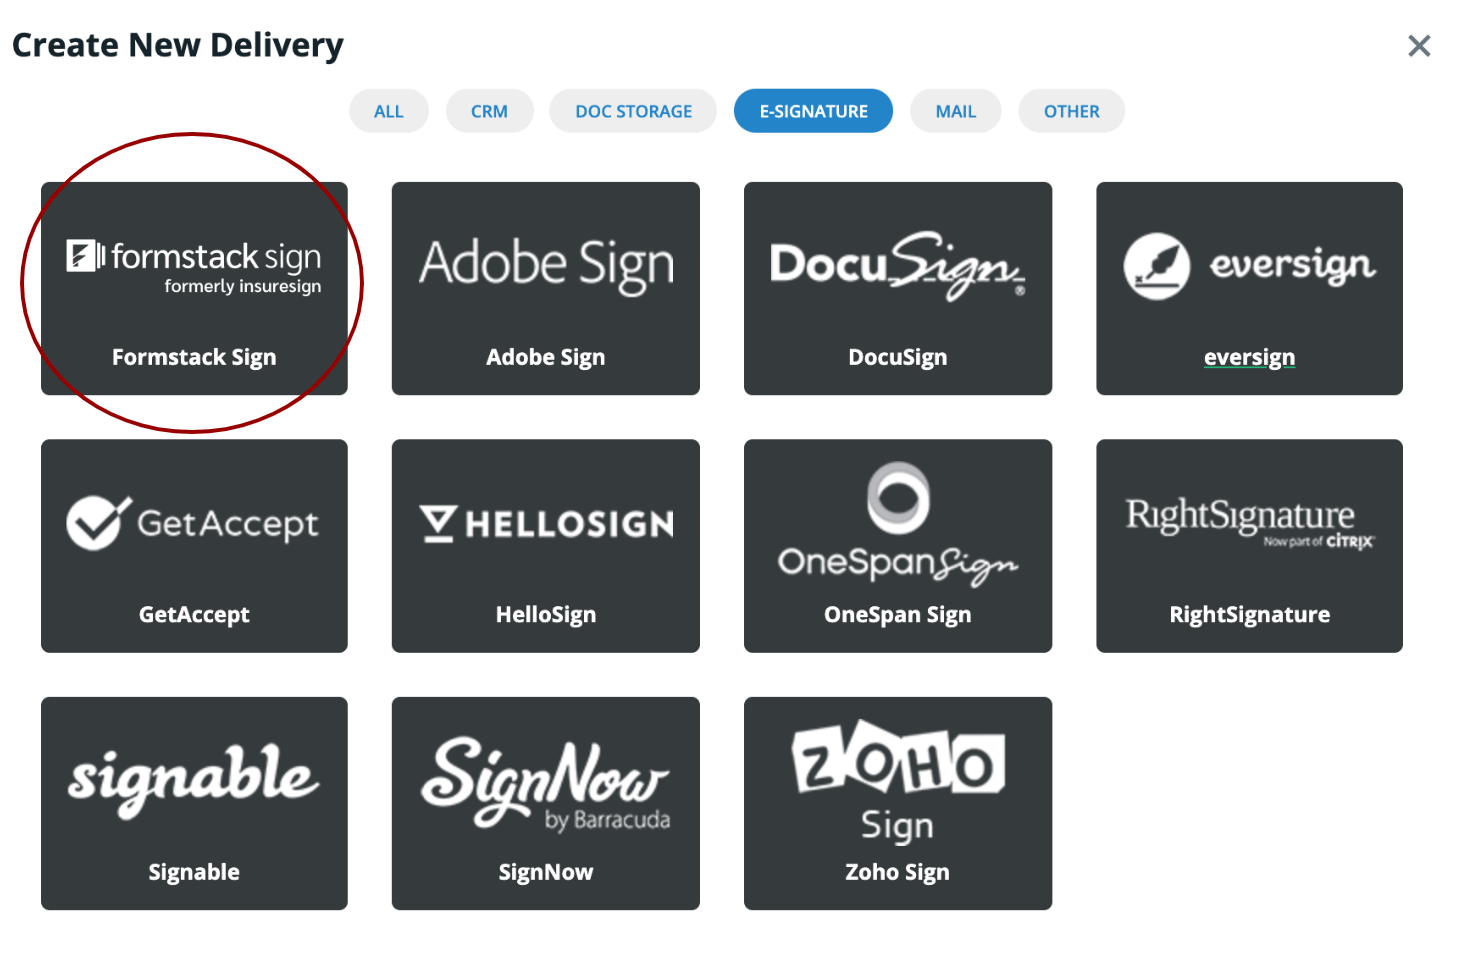
Now that our template is ready, we can upload it to our Documents. Under the Deliver tab, select +New Delivery. This will bring up a window with all of our delivery options. Select Formstack Sign.

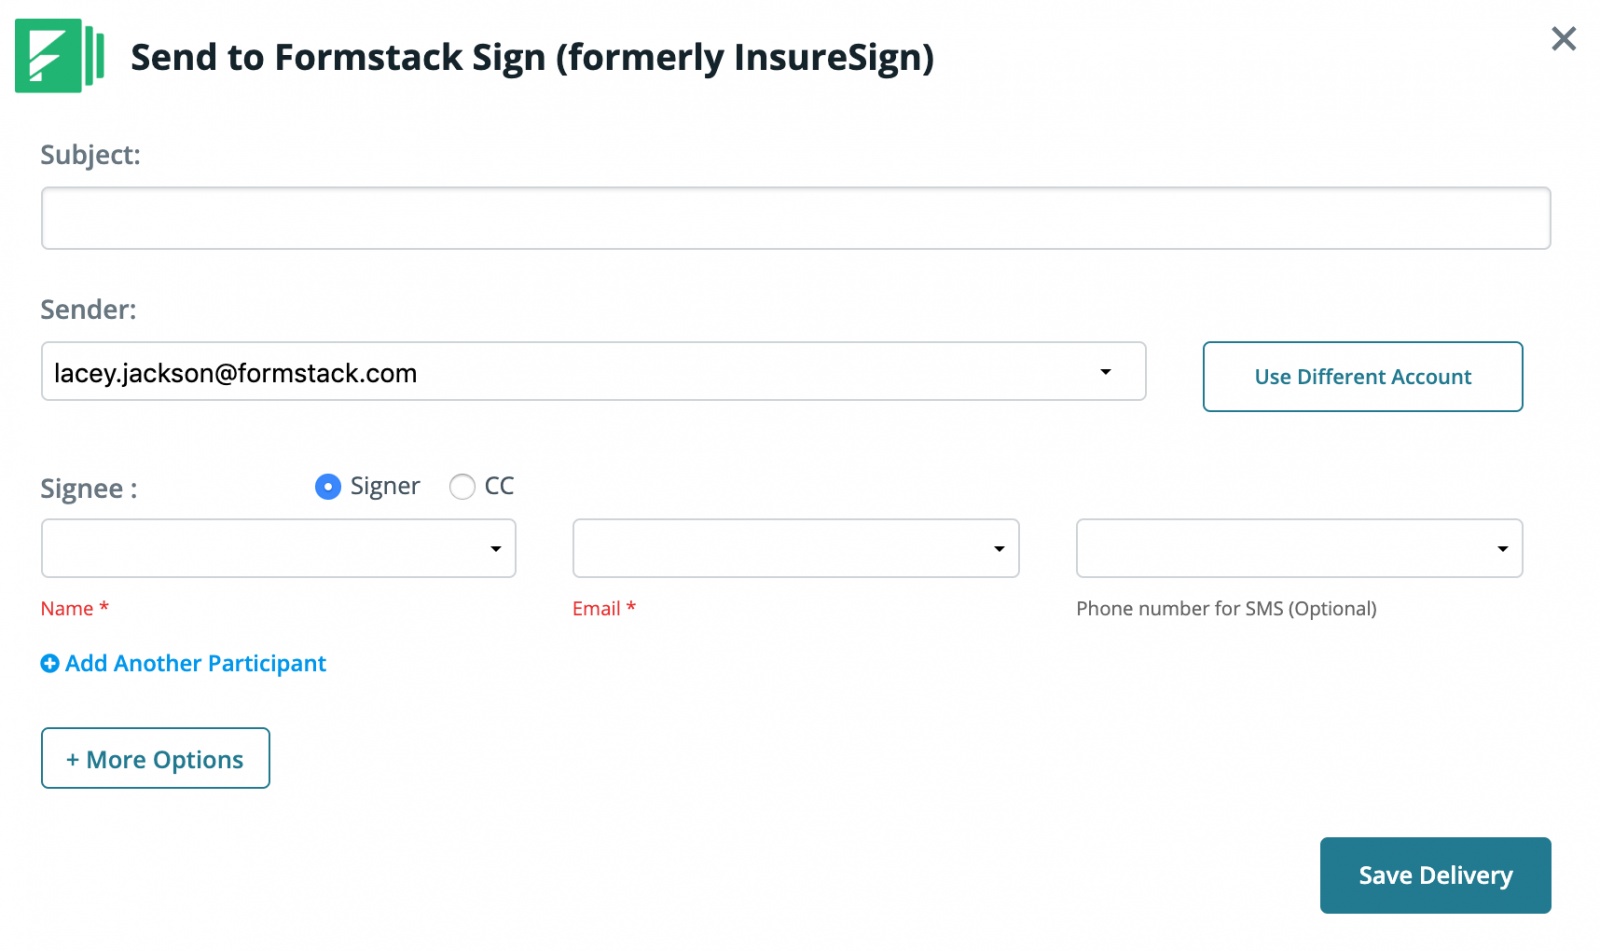
After you select Formstack Sign, you will be prompted to connect your account and be directed to this screen:

Here, we can customize our delivery options and add our sender/signee information. Since we need to collect multiple signatures on our rental agreement, we'll select the + which will give us the ability to add more information.
You even have the option to send your document for signature directly on the signee's phone. Simply add a phone number, and they'll recieve a link via text message!Â

Step 4: Connect to Formstack
After you have saved your Formstack Sign settings, you're ready to connect to Formstack and start collecting rental agreement data from your applicants. Login to your Formstack account, navigate to the form you want applicants to fill out, and select the Settings tab. From there, select Integrations and scroll down to Formstack Documents. This will add the Documents integration to your form.
After entering your Documents API Key and Secret, Formstack will load a list of the documents in your Documents account. From here, you will select your Rental Agreement.
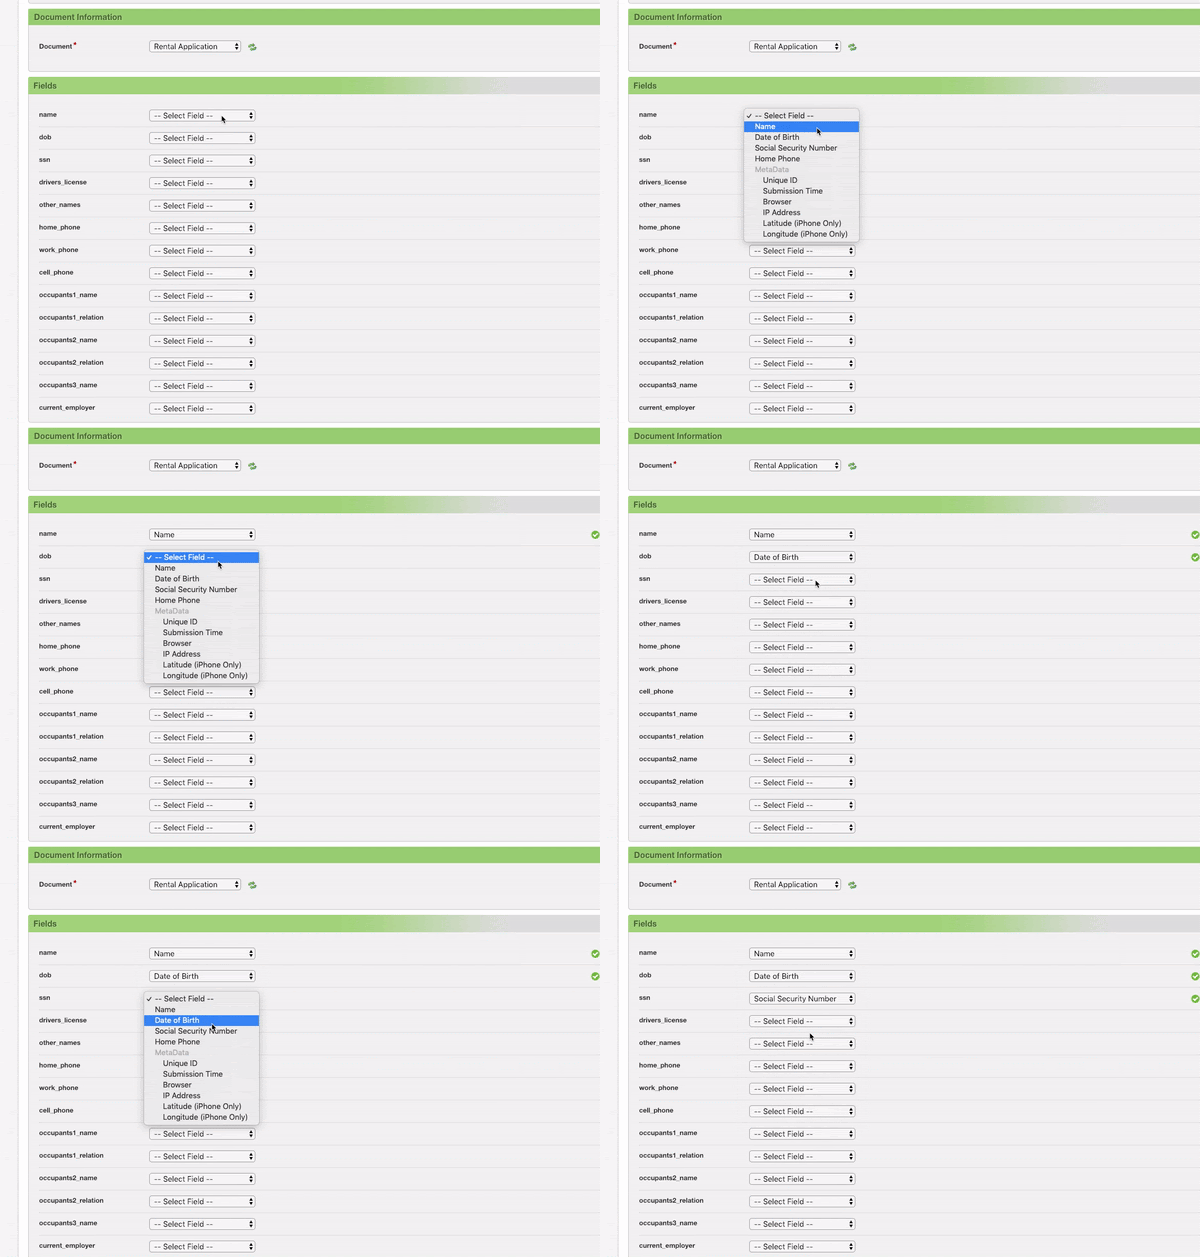
Formstack will then load a list of possible merge fields into your document. For each merge field, you will need to select the corresponding form field from the dropdown menu. This will tell Formstack how to send the form data over to Documents to correctly populate the document.

Once you have matched up all of the fields in Formstack, the setup process is complete, and you're ready to send your Formstack rental application form out to applicants! When applicants submit their information, Formstack will send that data over to Documents, Documents will send the populated document to Formstack Sign, and Formstack Sign will collect signatures on your populated document.
This isn't the only process you could revolutionize with Formstack Forms, Formstack Documents, and Formstack Sign. From contracts to HR documents, these tools will transform how you collect and manage your data. Get started right away with a free trial of Formstack Documents.


